
Controlling Temperature in your Wood Fired Pizza Oven
Controlling temperature in your wood fired pizza oven
The charm of a wood-fired pizza cannot be overstated. The smokey aroma, the perfect crust, and the authentic taste make it a heavenly delight. However, it's not all about the recipe; mastering your wood-fired oven is an art in itself. If you are a proud owner of a wood-fired oven and want to cook the perfect pizza, this guide will help you with starting the fire and controlling the temperature of your pizza oven.
Fuel types for wood fired ovens
Wood Pellets
Source: Wood pellets are compacted sawdust or wood shavings, often by-products from lumber and wood processing industries.
Advantages: They have a consistent size and moisture content, resulting in a predictable and steady burn. Pellets produce less ash, require less storage space, and are environmentally friendly due to their origin from waste materials.
Usage: Some wood-fired ovens are specifically designed to burn pellets. These ovens often have an automatic feeding system, making the cooking process smoother.

Wood pellets are also a cost-efficient option. Overall, pellets cost less than gas and other solid fuels for the amount of heat and length of burn time you get. A large Ooni bag provides up to 12 hours of cooking.
Kindling
Source: Kindling refers to small pieces of dry, easily combustible wood or other materials, ideal for starting a fire.
Advantages: Kindling ignites quickly and helps establish a strong base fire. It's essential for efficiently starting fires in larger wood-fired ovens where large logs can take longer to catch fire.
Usage: Begin with kindling to ignite the fire, then add larger pieces of wood to build and maintain the desired heat.
Joe Formisano founder of Delivita “The choice of wood is crucial in maintaining the desired temperature in your oven. Always use dry hardwood with a humidity level below 20%. The ideal wood choices are beech or ash. However, try to avoid oak as it's a dense wood and takes more time to ignite.”
Wood
Source: Traditional logs or chunks are commonly sourced from various types of wood. Beech and ash are among the popular choices when ease of ignition is a primary concern.
Advantages:
Beech: It's a hardwood that's known for burning hot and clean. Its moderate moisture content ensures it catches fire reasonably quickly, producing a steady flame and consistent heat.
Ash: Often praised as one of the best firewoods, ash has a low moisture content even when green. This characteristic makes it one of the easier hardwoods to ignite. Ash also burns steadily, offering a good heat output without requiring frequent refueling.
Usage: For those looking to quickly start a fire without the hassle, beech or ash can be an ideal choice. These woods not only catch fire more easily than some other hardwoods but also maintain a consistent burn, ensuring efficient heating of the oven.
“Use wood dried to below 20% moisture content, ideally closer to 15%. This ensures a clean burn with minimal smoke.”
Sustainability
Think about sustainability! Wood is a natural resource and as wood fired cooking increases in popularity, it’s more important than ever that we only burn wood from sustainable sources. Sustainability means more than just coming from a sustainably managed woodland though, it also means considering the road or boat miles, the packaging, and the energy source used for kiln drying. Paul & Heather who founded Love Logs source firewood exclusively from sustainable British woodland and are completely plastic free.
Starting the Fire

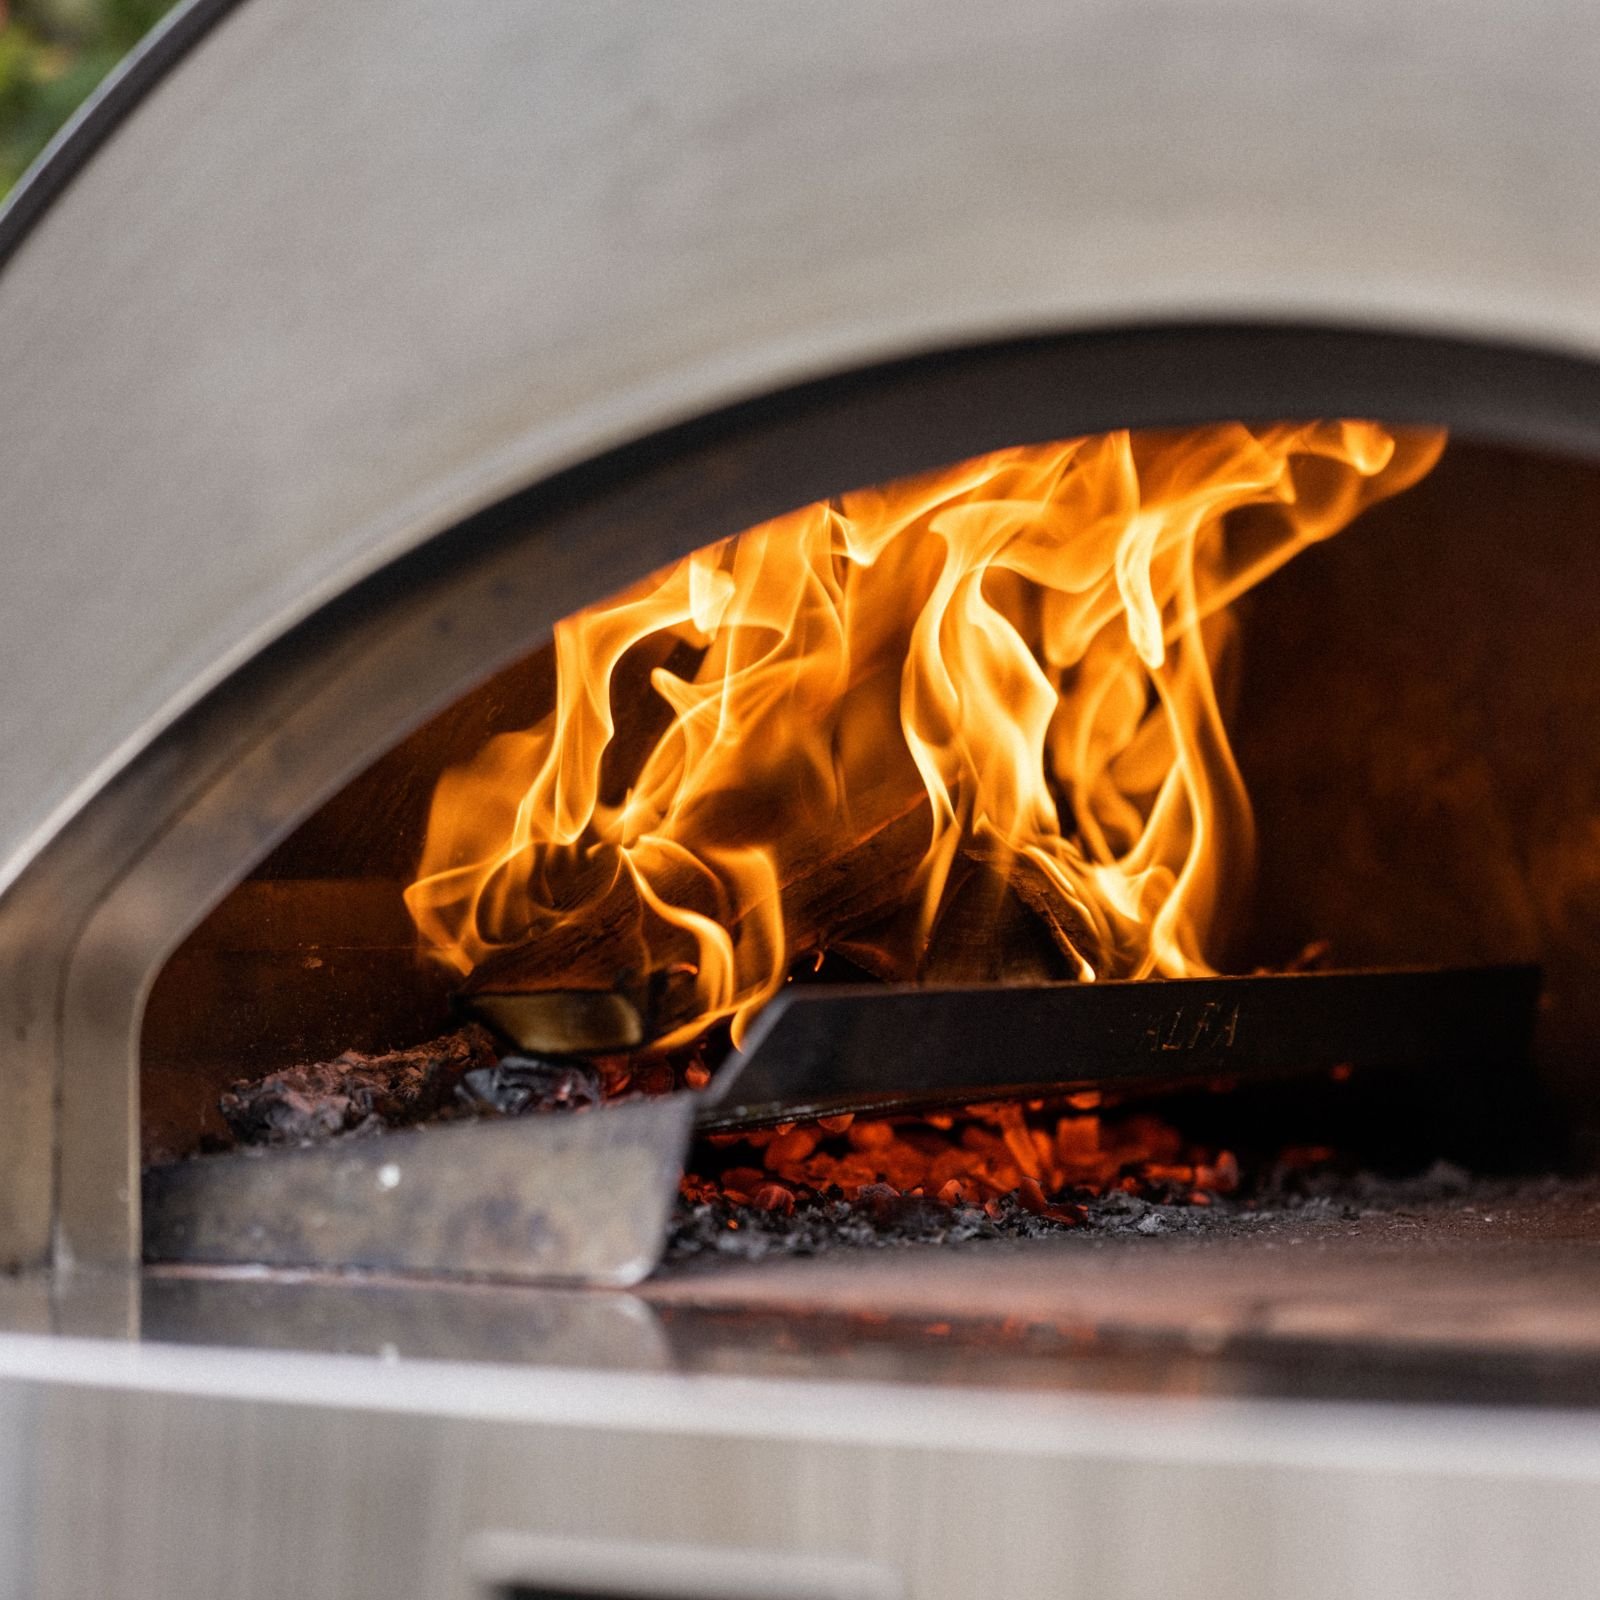
First, let's discuss how to light up your wood-fired pizza oven. Using the recommended method by DELIVITA, begin by constructing a Jenga-like structure with your kindling in the middle of the oven. Place an eco-lighter in this structure and top it off with a 10cm diameter piece of hardwood.
After 20 minutes, add an additional piece of hardwood, which should ignite quickly, bringing the centre of the oven to approximately 350 – 400*C. At this point, you can push the wood into the back of the oven. Always remember to cut the wood logs before placing them in the oven. Fresh cuts enable the flame to catch quicker. Also, avoid wood with bark as it generates black smoke.

A traditional brick oven might take up to 2 hours to reach the right temperature, whereas a modern stainless steel oven like an Alfa Forni can get there in a matter of minutes. No matter how different they are, all ovens have this in common: you must give the entire structure enough time to heat before you start cooking. Even if the required air temperature has been reached, the oven floor may not yet be hot enough to cook on.
“Think about the fire triangle when running a wood fire. Fire needs fuel, oxygen and heat to burn, with oxygen just as important as fuel. This means building and adding to your fire in a way that allows airflow into your fire at all times. With fuel management, less is more - if you’re struggling to get a clean fire, don’t add more fuel thinking that will always solve the problem!”

A must have tool is Delivita’s Prod & Blow – this allows you to place the wood into the back of the oven, the other function is that if the flame of the wood goes out you can simply blow through the handle to give air to the wood which will re-ignite the flame.
Controlling the Temperature
Once you've ignited the fire, moderating the temperature is crucial. Top up little and often when using hard fuels. For example, Ooni recommends getting the pizza oven stone up to a high temperature, then letting the flames drop a bit to ensure a well-cooked base without burning the toppings.
Smoking
In the world of BBQ, crafting delicious dishes like smoked fish stands out as a favourite among many. Morso offer some top tips to smoke food in a wood fired oven.
The key to perfection is heat distribution. Start by arranging the embers around the edge of the Forno in a half circle, ensuring a consistent, even heat. Next, position the Morso Tuscan Grill inside the Forno. Sprinkle a touch of smoke dust over the nearest embers to add that authentic smoked flavour. To complete the setup, secure the Forno Door and top off with the Smokeeper smoking cap.
Paul from Love logs adds “Different species also have different smoke profiles. Fruitwoods like apple and cherry are brilliant for smoking as they produce a lovely delicate smoke, whereas beech produces a stronger smoke profile so is better for wood oven and open fire cooking, with a clean flame.”

How to make Pizza Dough with Love Logs

Paul runs Love Logs with his partner Heather. After buying their first pizza oven in lockdown, Paul & Heather were frustrated with the quality of wood they could order online. Love Logs is now the UK’s leading online retailer of specialist pizza oven wood, cut to the perfect size for your oven, always sourced from sustainable British woodland, and always delivered next day in completely plastic free packaging. Love Logs also sell British lumpwood charcoal as well as a variety of cooking wood for BBQ and open fire cooking.
For me, the starting point is to think about dough making as a skillset rather than a recipe – of course you can use a recipe to give you your ingredients, but you need to invest time in learning about the factors than can affect your dough, as well as a number of different techniques used through the process
So, this is a recipe with a difference – you’re going to need to put some work in to find out the exact ingredients you’ll need for the dough you want to make. Download an app called PizzApp, which will give you the precise ingredients for a certain amount of dough when you plug in your planned length of prove as well as your room/fridge temperature. You’ll be asked to pick a dough hydration, 60% is a great starting point, once you’re happy there you can increase your hydration by 1-2% at a time – all my dough these days is made at 63% hydration which I find bakes beautifully but isn’t too difficult to handle. Of course, you can keep pushing this up and up, but I don’t personally find the benefit is worthwhile when balanced with the increased difficulty of handling. You’ll need accurate scales to weigh everything out precisely, including yeast weighed out in increments as little as 0.01g.
The best dough is proved for 24-48 hours or more – longer proved dough tends to be lighter, more digestible and have better flavour – but this isn’t always necessary, you can make good dough in just 4-6 hours if you want a quick pizza fix! A super important part of good dough is matching the flour you use to the length of prove you have planned. Different flours have different protein contents – the higher the protein, the longer you should prove your dough. Flour with 11-12% protein should be used for proves of 6-18 hours, flour with 12-13% protein can typically be used from proves from 18-36 hours, and anything over 13% should be great for long proves of 36 hours or longer. This is a rough guide but there are loads of resources online where you can learn more.
From there, it’s as easy as following the steps below
1. Mix your flour and yeast and together in a mixing bowl.
2. Incorporate your water about 10% at a time, using either one hand or a wooden spoon to mix; keeping your spare hand dry and dough-free is a good idea. Once roughly half of your water is incorporated, dissolve your salt in the remaining water and continue adding it to your flour mix.
3. Once you’ve combined all the water and scraped your bowl down and have a rough, shaggy dough, cover the bowl with a damp tea towel or put the lid on if it has one, and leave the dough for 30 minutes. This resting stage will allow the dough to absorb all the water and start developing all on its own, making it easier to work with. This is the start of your bulk prove, so the proving time you used in PizzApp starts now.
4. After 30 minutes, it’s time to knead! Kneading builds strength in your dough but it isn’t the most important step, so you can do this anywhere from one minute to ten – watch some YouTube for technique, or you can use a mixer if you have one. It’s important not to add any flour to your work surface, as this will reduce the hydration of your dough.
5. Once you’ve kneaded for as long as you chose, it’s time to do some stretch and folds to start building tension in the dough, which is the most important step to build your gluten network and give your dough strength. Fold the dough over on itself, dragging the front of the dough back under itself to create tension across the top of the dough mass – this is a simple stretch & fold.
6. Turn the dough through 90 degrees and repeat – you’ll see a taught surface start to form on the top surface of the dough. Again, YouTube is your friend for technique here. After 5 or 6 stretch & folds, pop the dough away into an airtight container to continue to prove.
7. Depending on the length of your prove, come back every 30 minutes for 2 hours or every hour for 4 hours, and do 5 or 6 stretch and folds each time. This will mean that by the end of either 2 or 4 hours, you have done 5 stretch and folds including the first one in step 5. With each set of stretch and folds you should notice your dough is becoming more elastic, and can stretch further without tearing, until at the final step you should have a beautifully tight surface on your dough. Now your dough can go away to complete the rest of its bulk prove.
8. I always ball up at least 6 hours ahead of when I want to bake, which allows my doughballs to be relaxed when I’m ready to bake. For a shorter prove, this can mean your balled prove is longer than your bulk prove – this is okay! I use a 250g doughball for a 12-inch pizza, but anything from 225g-275g can work. Tip out your bulk dough and cut portions off while trying to keep the taught skin on the top intact. With each doughball, do 3 or 4 stretch and folds, continuing to build tension in the existing smooth surface, folding the bottom of the doughball in on itself. Use your fingers to grip the sides of the doughball and push the bottom of each ball in on itself. When you have a nice smooth, tight surface, flip the doughball upside down and seal the bottom – pinch the centre together into a seam, ensuring no air can escape and all the air bubbles from your fermentation will stay in your dough through the next stage of proving.
9. Ideally, line your doughballs up in a proving tray with an airtight lid, but you can also prove them as single doughballs in any form of food-safe tub or Tupperware, as long as it has a lid making it airtight. Don’t use any flour or oil, as again they will affect your dough and how it cooks in the oven. A tight, well-sealed doughball will release pretty easily from most containers without oil.
10. Assuming your room temperature stays as expected, your doughballs should be ready like clockwork, but over time you will develop an understanding for when they aren’t quite ready, perhaps due to fluctuating temperature. If your doughballs fail to stretch properly and they spring back, the dough isn’t relaxed enough yet and needs a little more time – just pop them away and come back in 30 minutes.
11. Time to stretch, top and bake your pizza! Yet again, Youtube is a fantastic resource for technique, so it well worth investing some time watching videos.
Good luck, and feel free to reach out to me any time via our social media – our username on all social media channels is @planetfriendlyfirewood and you'll also find regular videos, hints and tips about all things pizza making, so give us a follow!
Happy pizza making! Paul